Mar 13, 2016

I've got "Star"bread in my eyes!

A few years ago, I was cruising through some recipes on the Internet, and stumbled across one for a chocolate almond butter Starbread.  I am not a fan of the sweet stuff, I am much more a savory girl that the flavors didn't appeal to my taste buds. But, the shape was so darn cute, I had to make it!  I did, and took it to a family reunion, and got rave reviews. So, I returned to the kitchen and turned the basic idea into MY type of Starbread.

 Here are the basics on how to make this addicting bread.
You will need:
A batch of  your favorite pizza dough, or you could use store bought pizza dough (the round ball kind, not the "stuff" in the pop open tubes.)

For the filling:
A splash of olive oil to saute in                        1 medium onion, diced
4-6 cloves of garlic, diced                                4 cups of spinach, roughly chopped
1 cup ricotta                                                      1/2 tsp dried basil
1/3 cup Parmesan cheese                                  Pepper and salt
A drizzle of good balsamic vinegar

Preheat your oven to 425 degrees while preparing this recipe.
Start by making the pizza dough ( I'll give my recipe at the end of this blog.) While the dough is rising, make the filling. Saute the onions in about 3 tbsp of oil for 3 minutes, then add in the garlic and saute for 2 more minutes. Finally, add in the spinach, salt and pepper, and saute until the spinach is wilted and the onions are translucent. Add the drizzle of balsamic vinegar to the spinach mixture, stir in well.Remove from the heat, and let cool for a bit.
Only three doughs, not four!

 Meanwhile, mix the ricotta, the basil, and the Parmesan cheese in a small bowl.  Add the  slightly cooled spinach mixture to the ricotta and mix in very well.  Your mouth should be watering at this point from the aroma!


Next turn out the pizza dough on a floured surface, and divide into 3 equal portions. Roll each into a ball and let sit, covered for 5 minutes. Roll out each of the dough pieces to a 10 inch circle. You will need to roll out, stretch, let rest for a minute ( I work on the other two pieces during this time,) and repeat until the gluten relaxes and you can get the circles to 10 inches or so.

Once you have your three pizza circles, you will need a small bowl with water and a small brush or your fingers.
 On parchment paper or a baking sheet, lay out one circle and brush the outer 1/2 inch of the dough with water. Spread 1/2 of the ricotta mixture on the dough, staying away from the edge by 1/2 inch. Place the second pizza circle on top of the first, and with your fingers seal the edges together, On the second layer, repeat  brushing the water to the outer 1/2 inch, and spread the remaining filling on the second circle. Place the last circle on top of the other two, and seal. On this final  sealing, I make sure that all three layers are good and together.
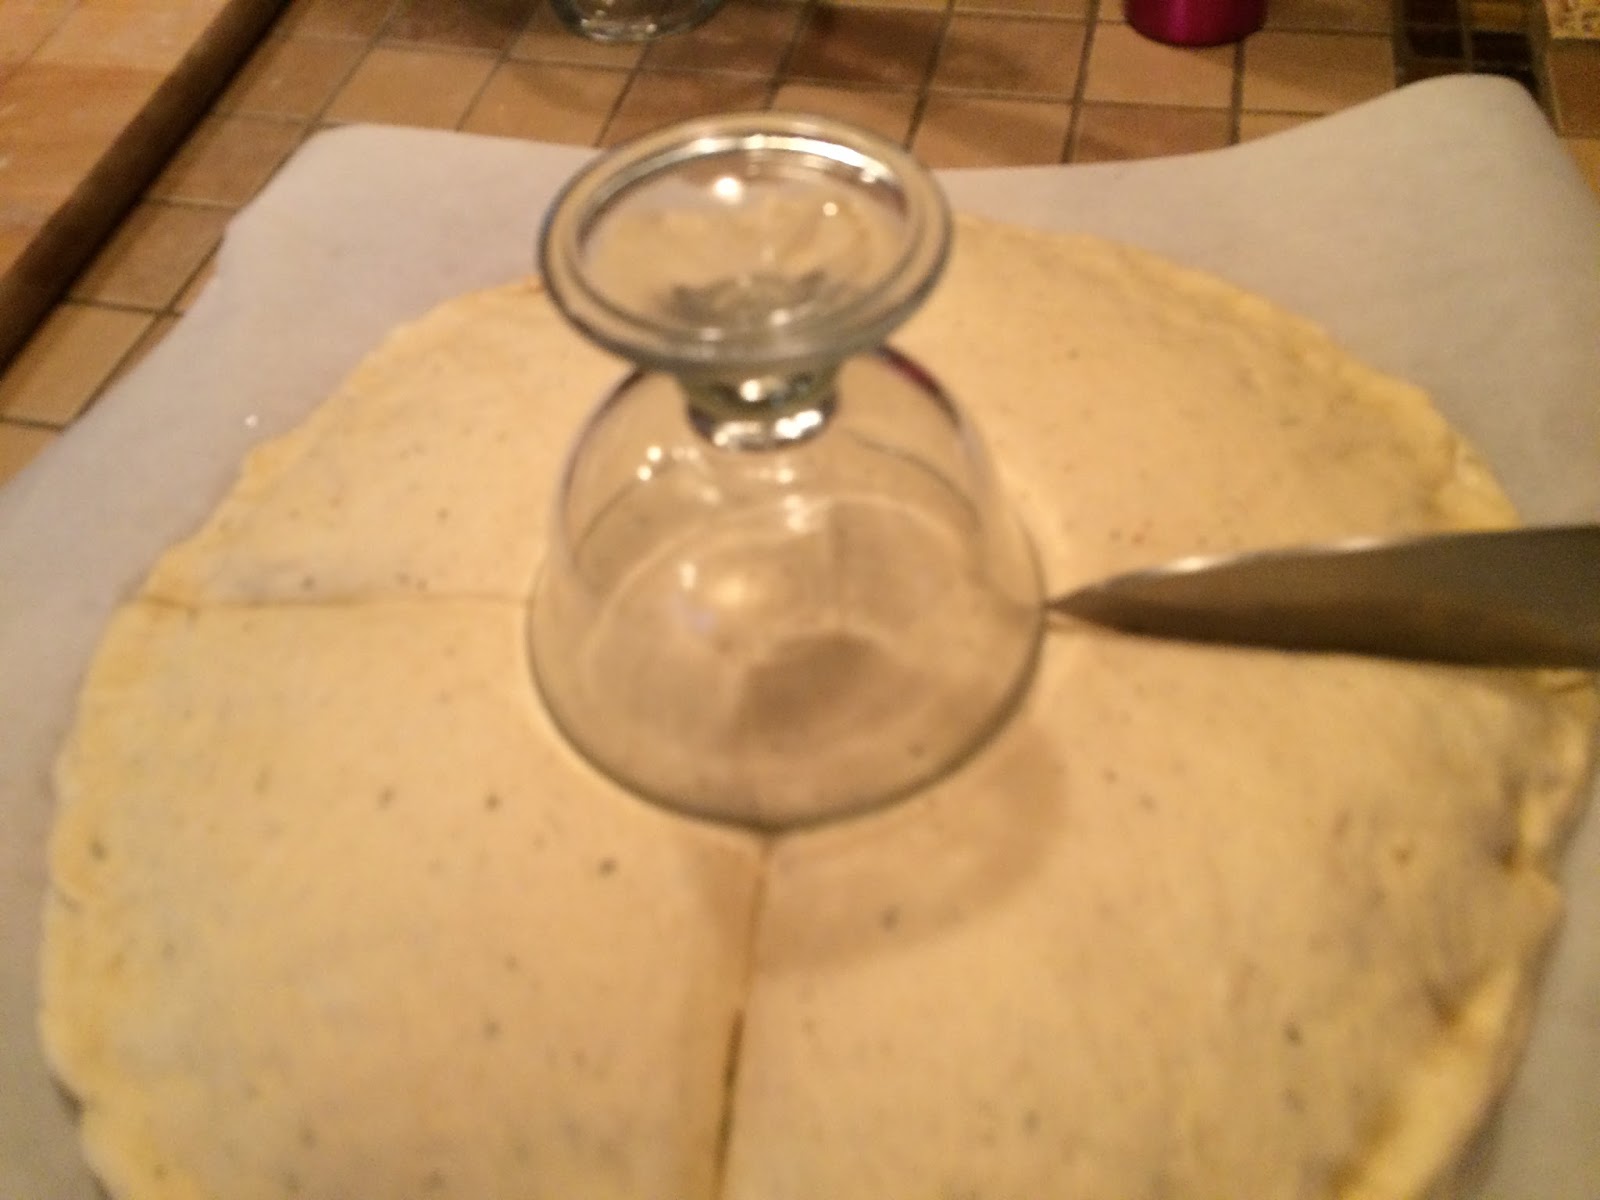
Now for the shaping of the bread itself. Put a small bowl, upside down in the middle of the bread, just let it sit there. It is going to be the guide for where to end each cut.
Using a sharp knife, cut the bread into 16 wedges. I cut it into quarters first. then eighths, then sixteenths, to try to keep them even.


 Starting anywhere on the bread- brush a little water around the outside 1/2 inch of dough. Take a wedge of the bread, and twirl it to the RIGHT for two turns and flatten out the end tips. Going to the wedge immediately clockwise to the first, take that wedge and twirl it to the LEFT for two turns. Flatten out the bottom end points and seal the middle of the two wedges together. Move to the next set of wedges and repeat, sealing the middle of the endpoints, and also the two points that have been twirled together.
 You should be able to see the pattern emerging. Don't worry if the twisted wedges don't touch in the middle, they will rise in the oven. Do be sure that within each pair, one twist is to the right and one to the left so they are mirror images. And be sure that the endpoints at the bottom are well sealed. Continue around the bread in this fashion until all of the wedges have been twirled, and the endpoints sealed.


At this point, I like to take a 1/4 cup of oil, and add some garlic powder and dried parsley to it. Using a pastry brush, brush the oil over the crust of the bread. Slide the parchment on a pizza peel and into the 425 degree oven onto a baking stone if you have one.  Otherwise, just put the sheet pan with the bread on it into the oven.  Bake at 425 for six to seven minutes, and then lower the oven to 360 and continue to bake. The bread will become crusty and golden brown- check the bottom to gauge doneness. When the top taps hollow a bit, I check the temperature of the middle. I like to use thermometers- I find I get a better consistent product each time with them. Bread is usually done when the internal temp is around 200 degrees.


And you have it!


I like to serve mine with a simple garlic butter for dipping. You can make it as garlick-y as you want. Or I think some canned marinara would be a classic sauce to use as well.


Enjoy!


My quick pizza dough:
1 cup warm water
1 tsp sugar
1 package yeast
3 cups bread flour
1 tsp salt
a little dried Italian seasoning

Mix together the water, sugar and yeast. After proofing, add the flour and the salt, mix well in a mixer with a dough hook, or by hand. Knead for five to six minutes, then oil and put in a bowl to rise. Rise for 15 minutes, then start the shaping as above.

Just a quick book update- the proposal is done and I will be sending it out on Monday- so any good thoughts are appreciated! I am so excited about the quality of the meals in my cookbook- they will look and taste good on anyone's table.
As Always... Live Peacefully. Cook Fearlessly.
Chris

Mar 10, 2016

Jumping off the plank and into the fire

(Note: this is a great one from 2 years ago- and I use the boards all summer. A new blog recipe is in the works, first trial done tonight, and it was yummy!  Just a ferw things to tweak and it will be out on Sunday. Want a picture preview? Click here. )

  While searching down a killer pulled pork recipe for a friend's dinner party,  I stumbled across grilling on a wooden plank.  These planks come in different woods: cedar, oak, hickory, maple were just a few I found.  Well, this inspired me to see what I could do.  
First off,  I found LOTS of boards on Amazon... but how to choose?  And, as many of my friends will attest too, when I get an urge to try something... in the very whiny, immortal words of Veruca Salt  (how's that for an obscure reference!  :)  "I want it, and... I waaannnt it NOW!"


Fresh from the soak
So off to Lowes... who just happened to have Cedar planks in their grilling section, I really wanted the hickory ones, but I live in the boonies.. and beggars can't be choosers. ( Or they have to wait for the Amazon Prime to get to their house  :)  I looked up a few recipes for ideas, but most all featured salmon, and neither the hubby or I can stomach fish . (Unless you count minced, heavily battered, deep fried and smothered in tartar sauce yumminess) I soaked the planks under water with salt added for a few hours.  At the appropriate time, I took the planks out of the water and "toasted" them on the fire. You are supposed to hear some crackling from the boards when they are toasted enough.
When I heard that I took them off the grill and lightly brushed some canola oil on them. WOW -did that aroma smell good, just like a campfire...

Toasted and brushed with canola oil
After heavily seasoning the hamburger patties with good ole sea salt and pepper, both sides! I put the patties on the grill and cooked 3 minutes or so each side to brown them. ( I rushed this a bit, the heat was a little low- next time I will really let them get brown and crispy!) 

Waiting to go onto the rolls
Then the patties were transferred to the planks and put over indirect heat in the grill. I tried to keep the middle burner on only and the grill at about 350 degrees.  It took about 5 minutes each side to get the burgers to well done. I usually like them rare, but I really wanted to try out the cedar taste.  Then, I melted cheese on the burgers and called over the men to try.  The last picture shows the final result and our supper for tonight.  The burgers were very well seasoned- and had a faint undertone of the cedar.  It was better than I had hoped... frankly I was a little afraid that I was going to end up with a hamburger that tasted like those pine tree car fresheners smell like... Yuck!  Its definitely going on the "must be made again" list.  I already have other ideas of hamburgers and combinations...  Maple board hamburger with cheddar cheese and grilled onions.....Hickory board with Swiss cheese, fresh coleslaw, and pickles... ahh the list goes on and on.


And, ps- the rolls are handmade too. I tried an new idea out this afternoon with a quick rise , 90 minutes start to finish.  This is definitely a keeper too- I always know its a hit when the hubby tells me how good something is... he's a bit (that a real understatement! ) picky about his food.

 So I think that everyone should try this!  Or let me know if you have tried other woods that I don't know about yet. 

As always- Live Peacefully and Cook Fearlessly!                                        Chris

Feb 29, 2016

It is a Chris and Julia moment... French bread with the French chef (Part Un) Oh, and a quick follow up/redemption!

(Bloggers note- this is another one of my older posts, but with some good tips, and a real time update!)
    I was wandering on Youtube the other day and stumbled across some old episodes of "The French Chef with Julia Child."  I thought,  "well, I could use some French training" and chose the first one along,  Authentic French bread.  Being a LOVER of all things gluten, I watched along, learned a couple of new things, and decided that I would try out some of her ideas and techniques. So here is my first authentic French bread attempt.
My family loves a long loaf of crusty bread- they frequently can be seen brandishing the food item as a sword prior to me rescuing it for my meal- and yes, I have served many a broken loaf of crusty bread due to this activity. (Now you will know what went on in my kitchen when I serve you a broken loaf of French bread!)LOL
Anyhow, all of the ingredients went into the handy Kitchenaid- (which the helpful hubby pointed out was so, so authentic French chef (haha)). After the yeast had completely liquefied
 (there was a pointer I did not know- I always just gave the yeast a few moments to poof up.. it really does better if you let it get going!) To the right is after the first kneading took place.  I have the Julia Child cookbooks and followed her directions to a T.  She was really quite onto something. She nailed each time that the texture would change- and I learned that patience is a virtue in breadmaking!  Directly below is the first rising of the bread.  The little red mark is Julia's instruction to mark out 3x's the quantity of the dough that you have- so that you can be assured that it has risen enough. Not quite the "fly by the seat of my pants" technique that I was used to, but I was trying to really follow the flow. 


After not one, but two full rises, I finally was taught the official French way of shaping the loaves.  Again patience is required- as was a little bit of the pasta rolling technique that I investigated a couple of months ago.  Since I didn't have a linen breadmaking cloth, I improvised with parchment paper. I think that the loaves are a little small, I was trying to stretch the  dough just a bit to make gift loaves.  (Note to self- stop being stingy with the dough!) Yet another raise went by  (1 and 1/2 hours-   bringing the total at this time to 6 hours of rising! OMG.. I am so in the running for the "Patience of the Year" award! LOL)  Reading the directions, I found out that I needed to roll the risen bread over onto it's belly and transfer to the baking pan. Sounded straight forward enough, until I realized that the dough was stuck faster to the parchment than fleas to a dog!  By the time I got them over, they were sad, sad misshapen fallen French breads.  But, I was six hours into this, and into the 450 degree oven they went. I thought I just needed to wait the 25 mins, but no ... Julia told me that the loaves needed to be painted with a water wash, which was repeated at three intervals in the hot oven.   That's like 12 minutes of standing at the oven door watching my clock! After the allotted time and a mild burn later.... here is what came out:
Looks crusty but these babies are only about 1 inch thick- kind of flatbread looking.  However, the hubby liked the taste. I took a few to a friend's house and he hid the other 3 so I wouldn't be giving those away too!  But since I am off tomorrow looks a Part Deux to this little lesson!

Fast forward to 2016: I have done quite of bit of bread making since I posted this blog in 2014. Enough so that a major component of my upcoming cookbook is about breadmaking! I posted this older blog for two reasons. One, that everyone has to start somewhere in their baking adventures. And seriously, those sad, pasty flat little breads up there were part of mine. BUT, with a bit of practice, things can turn around!
Secondly, I want to REDEEM myself for those first loaves, so today was a bread making day and I took Julia back out of the bookshelf and applied my more refined skills on her recipe. 

TAA-DAA!  Just the way they were meant to be.  So the morale of this blog should be: " Just try it, it may fail horribly, and you try it again, and again- and THEN people start asking you for bread making advice! And you set out to write a cookbook on the topic." LOL
Please look to Julia's cooking show from PBS on Youtube, She had a wealth of information that is still relevant today.
Look for a new blog coming up soon on finishing vinegars and oils- my newest obsession!
As always, Live Peacefully. Cook Fearlessly.
Chris

Feb 22, 2016

A tale of two Bolognese

My note: This is an older blog that I did a few years ago- but the sauce is still as good as ever. Enjoy!

I always laugh to myself whenever anyone asks me if I am reading any good books.  They are usually talking about fiction- but all I ever seem to want to read anymore is cooking books, not recipe books- but actual cooking technique books.  This last weekend, I was with my daughter looking through a thrift store.  I always gravitate towards the book section, and I stumbled across a great book  "Essentials of Classic Italian cooking"  by Marcella Hazan. Not only was it a technique book- but also about one of my favorite styles of cooking, and a steal at $1.99!  I had already read through the first few chapters before my daughter finished up in the store!
Since I am off work this week, and because it was rainy and a bit chilly... I thought that a great Bolognese sauce and some homemade pasta would be the way to go. I have made Bolognese in the past and got some good reviews,but I thought I would try it the "authentic" way.  After simmering for about 5 hours, and making some fresh egg pasta to go with it- here is the final result that I served tonight.


Well- It was okay... there are a couple of things that I will change.  First off, when I make the mirepoix of celery, carrots, onion, and garlic- I will then puree the raw vegetables and cook them in the oil/butter until they are brown, well cooked and .. brown.  Brown is good and full of flavor. I think that this gives a great underbase to the sauce... it takes a while longer, but is well worth the richer taste in the end.  I did like the addition of milk while cooking the meat (something I had never done before) to minimize any acidity caused by the wine and the tomatoes.


So here is my (right now......cause I am always tinkering) version of Bolognese:

3 tbsp. oil                       1 1/2 c. carrots chopped      
 1 3/4 c. milk                  6 oz tomato paste
3 tbsp. butter                  2 c. celery chopped       
1/4 c. half and half         2 c. water
1 c. onion chopped         1 1/2 lb. hamburger       
2 c. red wine                 2 pinches dried oregano
3 cloves garlic, minced  
1 (28oz) can crushed tomatoes      dash salt

( I DID actually measure what I put in today- I usually am an "eyeball-it" type of girl!)

Puree onion, garlic, carrots and celery in food processor until paste like. Saute the mirepoix paste in the oil and butter until browned ( will take 10 mins or more)- stirring frequently. Add the hamburger and turkey- sauté until the hamburger loses its red color - add the milk and half& half, simmer until the milk is all absorbed. Add the wine- simmer until it is reduced. (To this point was close to an hour of time.) Then add the tomatoes, tomato paste, water, oregano and salt.  Bring to a simmer and reduce heat to a very slow and lazy simmer... and cook for at least 3 hours, more if you can.  Stir it fairly regularly so it doesn't burn, adding a half cup of water if it gets too dry in order to keep it from burning.  Don't add water too close to when you want to serve the sauce - you want the sauce to be very thick.. think chili consistency. When ready to serve - check seasonings- add salt if needed. You should end up with a rich, rich meat sauce that the family will love.. Just don't forget to make the homemade rolls. I ran out of time tonight and was reminded by my dad that they would have been the cherry topping on this meal.  (Think- note to self- bread is always good!) This made enough sauce for 5 hungry people.


Lets talk briefly about pasta- I recently started making fresh pasta when I have time. I think I may have gotten it!  Tonight,s was smooth and silky with a  good bite.  Took 10 minutes of heavy kneading though.. lets see what tomorrow's shoulders feel like!
LOL.... for now :)


Safety reminder-  ground meat always needs to be cooked to at least 165 degrees Fahrenheit- and you need to be aware of the utensils that touch raw meats and seafood so that they do not touch food that will not get to that temp. Every kitchen should have, use, and calibrate a food thermometer. End of safety tip!  :)

 So- go cook something spectacular- be bold and be fearless! 
As always, live peacefully. Cook fearlessly.

Chris

2/23/16-Recipe cookbook update: Currently I have about half of the cookbook written, and the first draft of the book proposal is undergoing lots of editing! I hope to have a very polished version of the book proposal in the next few weeks. Then I will send it out to a few agents that I really want to work with and.. we shall see what happens! More updates as the book progresses!

Feb 15, 2016

Blast from the Past.... And A DARNED GREAT Roll recipe

And so it Began....

(My Note: Earlier in 2014, I started this blog and put out some great recipes on it- then Blogger decided to delete the account, cause I got busy with Life, and let it slide a bit... you know how that goes.  I am going to put all these together with the current, and rerun some of the better ones, with a little editing! Enjoy!) 
  2014- Today I have been asked to make rolls for a family friend's party.  I have been seriously dabbling in bread making for a couple of years now- and had made rolls for a family reunion that were... in my humble opinion- DARNED GREAT!  Plus I got lots of compliments- which always warms my heart.  So I was up bright and early this morning- making the dough- enough for 80 rolls- plus a little extra so I could experiment with a new taste combination.
Here is the start of the process this morning around 8 am- coffee is just starting to percolate in my bloodstream.  
A few hours later.. the rolls go in and come out of the oven.
 
They smell great!  Hopefully my friend will like them!  And, what about the new trial taste combination, you say?  :) Well, I used a tried and true dough recipe, and added poppy seeds, turmeric (the new super herb that I hear about all over the place), and dried onion.  Here is the before shot and the after.  They were baked in the outdoor pizza oven- more on that later, too!
 

      "DARNED GREAT ROLLS"
1 1/2 cups warm water
2 tsp malt barley  ( you can get this in a health food store, or use brown sugar)
1 tbsp yeast
4 cups flour
1 tbsp butter
2 tsp salt
Dried minced onion, garlic, and rosemary
Egg wash  (1 egg with a tbsp of water beat in with a fork)
1. Mix the malt barley /sugar into the water in a mixing bowl with a dough hook attachment. Add the yeast. Let bloom for 5 minutes.
2. Measure and mix the flour and salt together, adding a few pinches of the minced onion, garlic, and rosemary -add to your tastes.
3. Add the flour/spices to the mixing bowl, start on speed one, adding in the butter right after starting.
4. Knead 10 minutes in the bowl, checking dough for consistency- a little sticky, not a lot. You can add a LITTLE flour or water a bit at a time if you need to.  Turn out into a oiled bowl, cover and let rise.
5. After dough has doubled, turn out on floured surface, and cut into 8-10 pieces, roll each into a ball. Place each on parchment paper and a baking pan/ or on a greased baking pan. Cover and let rise, about 45 minutes. Meanwhile start preheating the oven to 425 degrees.
6. Paint the rolls with egg wash, using a pastry brush and place rolls in the oven. Bake for 10 mins at 425, then reduce temperature to 375 and bake until golden brown, and taps hollow. Let them cool. and enjoy!
2016- this is still a go to recipe for me! 
 A little push for the book.. this was my preferred method of making bread back in 2014. Since then I have developed a innovative method for developing, and baking bread that is crusty, golden brown, and near fail proof.  I am in the process of getting that - and some great recipes featuring it, published. Stay tuned!
And, as always- Live Peacefully. Cook Fearlessly.
Chris


Feb 10, 2016

A Tale of Two (Breakfast Sandwich Maker) Eggs.. and how much I love Sunday morning!

The DH and I love a good egg muffin sandwich.
So imagine my delight about a year ago when I stumbled on a gadget called a Breakfast Sandwich Maker by Hamilton Beach.  Of course, it came home that very day to my kitchen! Every Sunday, was now Breakfast Sandwich day! Almost heaven... Almost, because it was a single muffin maker, and- counting myself and the DH, well, that makes two. So one of us (me) always had to wait for the second round of sandwiches.
Fast Forward to last Christmastime, and imagine my delight when I found a double sandwich maker was now on the market!!  The DH and I could eat hot sandwiches at the same time again. But, the pragmatic side of me couldn't justify buying the new, and improved version while we had a perfectly good one already.  Enter one of my best friends, who heard me lament about my predicament, and offered to buy one for me for Christmas, and I would "gift" her with my used one! Great friends are the best!
So- because this is a foodie blog- lets look at the food this machine puts out.


 Isn't She a thing of beauty? What she consists of is two plates, and upper and a lower that heats up. The lever that you see on the left side is coming from a removable set of two rings.


These are the removable rings that radiate heat, and cook the egg on the second level.  After 4 minutes you pull the lever, and the sandwich drops together.


These are the ingredients needed- today, I am making bacon breakfast sandwiches. Usually we have pork sausage, our favorite, but I wanted to shake it up a little bit and went with the bacon.  I needed to cook the bacon first, as the machine isn't on long enough to cook bacon.  With the frozen sausage patties,(they are fully cooked) I always defrost them for 30 seconds in the microwave before putting them in the machine. Along with the meat, I need cheese, an English muffin, and an egg.

While I am half toasting the English muffin in the toaster; I preheat the machine. (The directions say you don't need to do this. But I found that just putting in the raw muffins, I got crispy sides from the plates, but soft interiors.  Being the breakfast sandwich connoisseur that I am- THAT was unacceptable! LOL) Toasting the muffins half way keeps the crispiness all the way through the sandwich.)  Here you see the bottom half of the machine layered with a muffin, the bacon, and cheese.


I have flipped down the second set of rings, sprayed the plate with a little non-stick spray oil, and cracked an egg in each. This model even has a timer that I set for four minutes, and put down the top. After a minute, I open the lid, put the other side of the muffin on top of the egg, lower the top, and let the timer run out.


After the timer rings, I slide the lever, and watch the sandwich drop together.   I pick up the rings, and YAHOO!  two, TWO perfect breakfast sandwiches!


      And, this is what our rewards are on Sunday mornings! Did I mention that I love Sundays! LOL  
This is one machine that is worthy of counter space!
 As always,
Live Peacefully. Cook Fearlessly.  
Chris                                                                  

Feb 3, 2016

Every Cook has one... the dirty little secret. Shhhhhh.....

Until about 15 years ago, my cooking ability consisted of whatever box I could get a serviceable meal out of. Then I started to get serious about cooking, and well, became snobby.
          "I don't do boxed stuff", I would *sniff*/ tell myself in the checkout line when I saw the "cook" in front of me place box after box of prepackaged food on the conveyor belt. And then I would, rather proudly, put my lovely simple unprocessed food on the line.. vegetables, meat, stock and spices.  Then, I'd run to to save the beautiful vegetables and fruits from the harsh and uncaring checkout person; whose goal in life was to drop my babies into the cart, bruising them, and creating a whirlwind cause and effect of bruise and rot!  Ohh, how many checkout people did I offend, and how many had to have surgery to correct their vision after rolling their eyes so hard over my behavior. LOL  Here, on this public forum, I am admitting to my food snobbery. My name is Chris, and I am a food ingredient snob.
          So, imagine my chagrin when it turns out that one of my best dishes, the one DH (Darling Husband) drools over, and the one my friends all want the recipe for, is a call back to those days of boxes and....well, I don't even want to admit to it publicly.
     
       The recipe name is PORK STROGANOFF, and it is delicious.  You will read the ingredients, and shake your head, but really, you will want to try it.  Do it in secret, the way I always do- and no one will be the wiser about what you are putting in this yummy dish. First a little background, this dish used to be BEEF stroganoff- probably a little more recognizable- but when beef prices started to rise and I was paying $4 or more a pound of stewed beef, and coming out with tough chunks of meat that needed the jaws of life to chew- Well.. I went to the other white meat- pork.  At a third of the price of beef, I brought it home the first night, snuck it into the dish and waited with baited breath for my pork-hating hubby to try- and he LOVED it.  Wanted to know where I got the meat from! YEAH!
      So here is the down and skinny. Here is my miso en plae.
Ingredients:
Couple of tablespoons of oil- I use whatever is in the house
 1 1/2 pound of boneless pork sparerib, cut into cubes
1 med onion, cut in half, then sliced into 1/4 inch slices
3 cloves of garlic, minced
2 bay leaves
1 (8 oz) package of cleaned mushrooms, coarsely sliced
Salt and pepper, plus a little steak seasoning
1 1/2 cups beef broth
1/2 cup of sour cream
1/2 cup of flour
half a bag of egg noddles, cooked and warm . I'll tell you when to start them in the recipe
And the special , secret seasonings...).
Catsup, 5 or 6 swirls around the pot ( 1/2 cup) or so
Mustard, 3 or 4 swirls (1/3 cup)
Worchestershire sauce (1/4 cup)
See, I told you- shocking!
 Heat the oil in a large pan- I use a wok type pan. When the oil is pretty hot, add the meat,  brown on all sides, not just light, but a good golden coloring. With a slotted spoon, remove the meat from the pan, and add the onions. Cook the onions until they are starting to wilt, and add the garlic.  Saute until the onions are just turning transparent, then add the pork, the stock, and the bay leaves. Turn up the heat and bring to a boil- while heating add in the "special ingredients"- the catsup, mustard and Worcestershire sauce. When it gets to a boil- turn it down to simmer, and let simmer for 40 minutes. At about 30 minutes, start a pot of water, and boil the egg noodles. Taste the broth , and add more "special ingredients" if you want. Add the mushrooms at the 40 min mark, and let simmer for 5 minutes. Add a little water to the flour to make a slurry, and slowly pour it into the stroganoff to thicken to a good gravy thickness. Stop adding the flour slurry if it looks too thick. Cook for a few minutes, then remove from the heat.  Add in the sour cream.  By now the noodles should be done; I add a bit of butter to the noodles, and spoon the stroganoff over top. Garnish with a little dried parsley.
Delicious comfort food. <3
Even better the next day.  What?  What's that yummy bread on the side, you ask?  Well, that is horseradish bread- and it is the best!  That's the newest addition to the cookbook!

      So that is my confession.. and I feel much better.. but I am still going to watch those fruit and vegetable dropping checkout people like a hawk.

Anyone out there got a secret food confession- they want to share?

As always,
Live peacefully, and Cook Fearlessly!
Chris